dangerpuss

3 Bean Vegan Chili with Squash

In Soups on January 9, 2019 at 10:56 am

We’re into dark January days here in Portland right now, and our CSA is reflecting the season with winter squash, rutabaga, carrots, potatoes, and the like. So, I had a big kabocha squash on hand, and I thought, “why not?” and cubed some up for the chili I was making.

WHOA.

Turns out that squash provides a perfect counterpoint for the heat of the spices. And the texture, which is one of my favorite things about kabocha squash, was wonderful! This batch of chili turned out to be the best I’ve ever made, and now I can’t imagine making it without kabocha. Try it and see.

img_9847

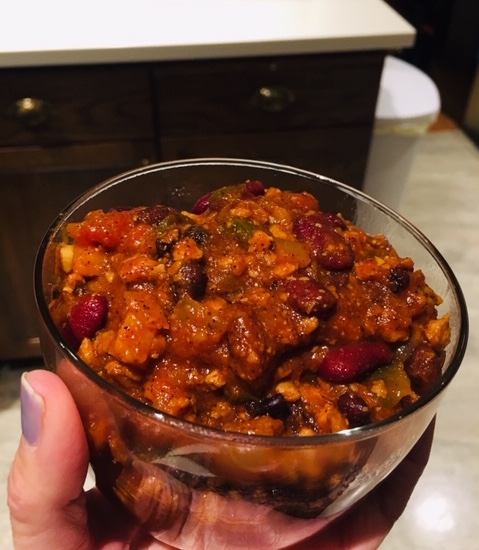
We are hungry, not fancy. Too hungry to wait to take pretty pictures of the chili, that’s for sure!

Makes enough for 6-8 people

1 large can crushed or diced tomatoes
2 regular sized cans of tomato sauce
1 can each (or dry equivalent, soaked) kidney beans, pinto beans, black beans
About a cup of TVP, soaked in a cup and a half(ish) of hot water, with a veggie bouillon cube and cumin + salt to taste, until it’s expanded and soaked up most of the water and is soft
2 Tbs olive oil
Half a small kabocha, cubed smallish. Leave the rind on! It softens up as it cooks.
1 small to medium yellow onion, medium dice
Half a red onion, medium dice
Several cloves of garlic, very small dice
1 green bell pepper, medium dice
1 yellow bell pepper, medium dice
1 large jalapeño pepper, seeded! and diced small
About half a jar of whatever chili powder you like
Cayenne to taste
Tabasco to taste
Salt…a tablespoon or two

I used a big crock pot for this but you could use a nice heavy pot on med-low heat if you don’t have one.

Put all the tomato stuff into the crock pot.
Rinse all the beans and add them to the crock pot.
Get your TVP soaking, and once it’s ready (about 10 mins), add that to the crock pot.

Sauté the squash and onions in half the olive oil until the onion is almost soft, then add all the peppers and the garlic. Sauté for a couple more minutes, until the onions are soft, then add the rest of the olive oil and all of the chili powder and the cayenne. Sauté a couple more minutes, then add to the crock pot.

Cook on the high setting of your crock pot for a solid 2 hours minimum. You’ll know it’s done when the squash is soft all the way through but not so soft that it’s losing its shape or falling apart.

Once the squash is cooked, add the salt, tabasco, and even more cayenne and chili powder if you want more spice. The salt should be added at the end rather than the beginning, as it will cause problems with your bean texture if added too early. Keep tasting and adding until you’re happy with the flavor.

Serve with vegan sour cream, cilantro, Follow Your Heart cheeze shreds, or however else you might like your chili.

Vegan Ramen (and not that damn package kind)

In Soups on November 4, 2016 at 9:06 pm

I just made this, and it ruled. It was my first time making ramen, and I couldn’t find a recipe I liked so I had to make it up on the fly. It’s not really a legit ramen, I don’t think, because of the vegan-ness and I was just using what I had in my cupboards, but DAMN is this shit good!

14915232_10154696839554518_867103957194380949_n

Feeds 5 hungry people, or 4 very hungry people. If there are two of you there will be leftovers, which you should keep separately (don’t put the noodles or toppings in with the broth to store it).

Edit: I just made this again and this shit was STILL good, even though I changed the toppings up and used chanterelles instead of squash and kombu instead of arame. As long as you have the stuff for the basic broth, you’re golden!

10 cloves garlic, minced
1 Tbs (or less if you can’t stand the heat) chilis in oil. I use Thai and True because they are local and awesome.
3 Tbs high heat oil. Use sesame oil if you have it, or toasted sesame oil. Yum.
1-2 Tbs shichimi togarashi
1/2 tsp salt
1 Tsp honey
2 veggie bouillon cubes
1 1/2 yellow onions, diced small
LOADS of dried ginger. Like, maybe 3 Tbs? Maybe 4? Or use a pile of fresh if you have it, or even brined will work.
1 delicata squash, peeled, seeded, and cut into small cubes
4 cups(?) water. The question mark is there because I really don’t know how much water I use. It changes every time. Put water in until it’s the amount of broth you want. Just make sure to taste frequently so you don’t dilute your flavor too much.
2 Tbs tamari
2 Tbs red miso paste
2 packages noodles. Use fresh ramen noodles, or packaged thick or thin rice noodles. Whatever you like.

Topping ideas:
1/4 package dried arame that has been rinsed, soaked, and rinsed again
3 sheets of kombu, rinsed and dried gently and cut into strips
1 can bamboo shoots (the kind cut into ribbons), drained
1 bunch green onions, cut into whatever size pleases you
A handful of diced, fresh mushrooms
Diced tofu, fried or not depending on the texture you’re going for
Fresh bean sprouts
Shredded carrot
Fresh corn
Diced red pepper

A note before we get started: the process will go way faster if you have an immersion blender. Get that out if you have one. Otherwise you can use a regular blender, it’s just more messing around because you have to pour hot things into it more than once, and it’s annoying.

Step 1: Make a crazy garlic puree!

Saute the 10 cloves of minced garlic in 1 Tbs of the sesame oil for a couple of minutes, making sure to keep moving it around so it doesn’t get hard and brown. Add the 1 Tbs-ish of chilis in oil toward the end, saute for another minute, then add the 1/2 tsp of salt and 1 Tbs of honey. Set aside to cool a bit.

(Now is a good time to rinse your arame and set it to soaking, if you’re using arame.)

Pour your garlic sautee into your immersion blender container and puree it with a second Tbs of oil and about 1/4 cup of water.

In the same pan you used to saute the garlic, pour another 1/4 cup of water and use this to dissolve the 2 bouillon cubes. Add it to the puree once it’s dissolved and blend some more.

Put the puree back in the pan and heat till bubbling gently. Sprinkle some of that delicious shichimi togarashi in there. However much you want. It’s delicious, so you probably want lots. (Are you crazy? Don’t trust me; taste that stuff first before you put it in, otherwise it might feel like regret later!) Stir it around while it bubbles for a minute or so, then set aside.

Step 2: Now make the bulk of the broth

In a big pot, saute the yellow onion in that last Tbs of oil for maybe 5 minutes, and then add all that crazy ginger and the cubed squash. Saute maybe 5 mins more, until the onions are nice and soft, and then add the tamari and enough water to deglaze.

Now add the rest of the water and let it all cook until the squash is nice and soft. When the squash is almost there, add the garlic puree and the red miso paste. If the miso paste is kind of hard, like mine was, make sure you break it up into small pieces or it will never melt. Stir well and let simmer til the squash it totally soft and the miso is melted.

Step 3: Make your noodles

Follow the directions on the package. Once they are done just rinse them in cold water so they don’t keep cooking, and set aside til you’ve figured out your broth situation.

Step 4: Decision time

If you want a thin broth, you’re going to strain what you’ve made into a bowl or other large container, and use that to serve. If, like me, you want all the nutrition, stick your immersion blender right into the pot and go to town until you have a nice, thick broth. Your choice.

Step 5: Time to eat!

Put noodles in bowl. Pour hot broth over noodles. Top with whatever you decided to use as toppings. Sprinkle with more shichimi togarashi. Eat!

Gluten-free pumpkin pie with whip, for the lazy vegan

In Sweet Things on December 5, 2014 at 2:36 pm

Oh, hi there! This might be a boring post for you if you are looking for food porn pictures, so if that’s the case move along. However, if you want a straight up simple recipe for amazing pumpkin pie with whipped (coconut) cream, then you’ve found the right place.

Step 1:

Go to New Seasons or your local goodfood mart and buy whatever frozen, gluten free pie shells they have on offer. You only need one but they often come in twos.

Step 2:

Pre-bake the crust as directed on the packaging, and while you’re doing that follow this recipe for the pumpkin pie filling. I used cornstarch, not arrowroot, beet sugar in place of cane sugar, and full-fat coconut cream, not almond milk.

Step 3:

Make coconut whipped cream using this recipe. I experimented with full fat coconut milks from Whole Foods (their brand), Thai Kitchen, and Trader Joe’s (coconut cream), and by far the best one was Trader Joe’s. The whole thing was nothing but rich cream, whereas the Whole Foods brand did not solidify at all and the Thai Kitchen one yielded less than half solid cream.

Important:

Refrigerate your coconut milk and make your pie one day ahead of when you want to serve it. Both need to sit overnight to set up. The next day you can make your whip right before you serve, and it will be great, or you can make it in the morning so it has a chance to set up a bit before you serve. Either way it’s totally delicious!

Thanks to Oh She Glows for the recipes! Angela* keeps a really pretty plant-based food blog, so while you’re there you should definitely browse around and check out her other recipes.

*I say that like I know her but I don’t. I’ve just been following her blog for a long time.